


















Research की tabs खुली हैं, notes अलग file में हैं और अगले हफ्ते का content plan अभी अधूरा है। अगर हर project में यही होता है, तो Perplexity Teammates से planning का नया तरीका जानना उपयोगी हो सकता है।
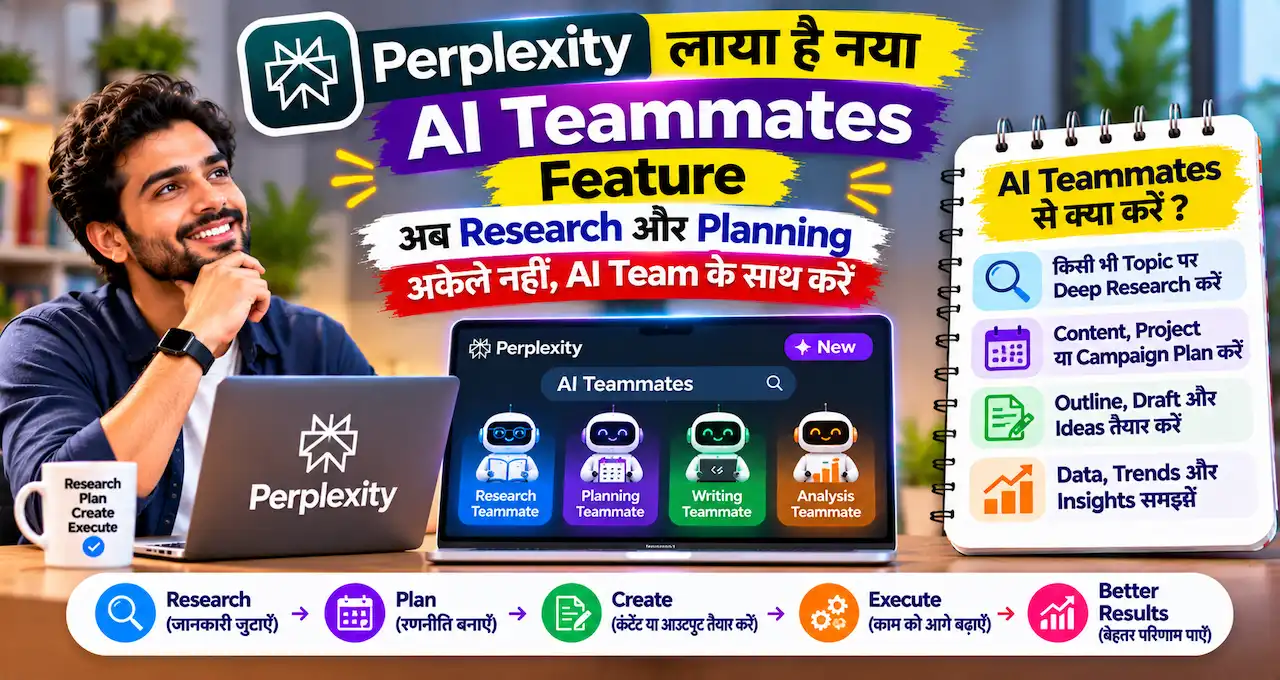
इसमें AI को सिर्फ़ एक सवाल देने के बजाय ongoing काम की जिम्मेदारी दी जा सकती है। अलग teammates research, planning और review की तैयारी में अलग roles निभा सकते हैं।
लेकिन इसे free digital staff समझकर शुरुआत न करें। पहले access, subscription और काम की सीमाएँ समझें, फिर देखें कि आपके workflow में इसकी ज़रूरत है या नहीं।
असली सवाल यह है कि आपका कौन-सा दोहराया जाने वाला काम AI को सौंपना समझदारी होगी।
इस लेख में आप क्या सीखेंगे?
- Teammates का practical इस्तेमाल
- Max access और कीमत
- Research और planning workflow
- काम सौंपने का brief
- Credits और permissions control
- Output की review checklist
एक जवाब माँगने और जिम्मेदारी देने में क्या अंतर है?
मान लीजिए आपने AI से कहा, “अगले हफ्ते के पाँच blog topics बताओ।” उसने list दी और बातचीत खत्म हो गई।
अब आपकी ज़रूरत अलग है। आप चाहते हैं कि कोई पुराने topics देखे, नए sources खोजे और बदलती जानकारी के आधार पर plan सुधारे।
Teammates का focus ऐसे ongoing काम पर है। Perplexity की official announcement के अनुसार वे Computer के projects, files और context पर काम करते हैं।
अलग जिम्मेदारियों वाले teammates काम आगे बढ़ा सकते हैं और परिणाम review के लिए ला सकते हैं। इसका मतलब यह नहीं है कि हर सुझाव अपने-आप सही हो जाएगा।
| आपकी ज़रूरत | उपयुक्त शुरुआत |
|---|---|
| एक सवाल का जवाब | सामान्य search या chat |
| एक विषय पर सीमित report | Research task और साफ output brief |
| बार-बार होने वाला project work | Teammate को तय जिम्मेदारी देना |
| अलग workstreams की coordination | अलग roles और shared project context |
छोटी ज़रूरत के लिए सबसे जटिल व्यवस्था चुनना ज़रूरी नहीं है। कई bloggers की शुरुआत free AI tools से research और writing व्यवस्थित करने से हो सकती है।
किसे access मिलेगा और कितने पैसे लगेंगे?
7 नवंबर 2026 को जाँची गई official Teammates guide इसे individual Max subscribers के लिए web research preview बताती है।
इस शुरुआती release में Enterprise Pro या Enterprise Max अपने-आप शामिल नहीं हैं। अपने account में feature की उपलब्धता देखकर ही कोई subscription decision लें।
Perplexity Max की official pricing के अनुसार monthly plan $200 प्रति माह और annual plan $2,000 प्रति वर्ष है।
| Billing | घोषित कीमत | कैसे समझें? |
|---|---|---|
| Monthly | $200 हर महीने | महीने के हिसाब से subscription |
| Annual | $2,000 प्रति वर्ष | औसतन लगभग $166.67 प्रति माह; भुगतान annual है |
| Free या Pro | शुरुआती Teammates access शामिल नहीं | Max upgrade और eligibility जाँचनी होगी |
Annual वाला औसत monthly price, हर महीने उतनी ही रकम चुकाने का विकल्प नहीं है। भारतीय users checkout में currency, applicable taxes और card conversion देखकर final amount तय करें।
Launch announcement में web access और iOS support आने की बात है। Mobile पर वही experience अभी उपलब्ध मानकर paid workflow न बनाएँ।
Subscription और काम की usage cost अलग समझें। Official guide credits की निगरानी करने को कहती है। जटिल tasks और parallel agents में consumption बढ़ सकता है।
Perplexity Teammates से planning: पहले काम बाँटें
तीन teammates बना देना अपने-आप अच्छी team नहीं बनाता। अगर सभी को “मेरे blog को grow करो” कहेंगे, तो काम दोहर सकता है।
पहले input, जिम्मेदारी और final deliverable तय करें। एक छोटे editorial project के लिए यह काल्पनिक विभाजन देखें।
| Role | जिम्मेदारी | Deliverable |
|---|---|---|
| Research teammate | चुने topic के primary sources और reader questions खोजना | Source URLs, dates और evidence notes |
| Planning teammate | Research को audience, archive और priority से मिलाना | Topic shortlist और proposed calendar |
| Review-support teammate | Unclear claims और missing evidence flag करना | Fact-check checklist और unresolved questions |
| आप, editor के रूप में | Sources खोलना, angle चुनना और अंतिम फैसला लेना | Approved brief या सुधार के निर्देश |
ये article के उदाहरण हैं, product के fixed built-in job titles नहीं। अपने काम के अनुसार role names और जिम्मेदारियाँ रखें।
शुरुआत में एक ही teammate पर्याप्त हो सकता है। दूसरा role तभी जोड़ें जब पहला output समझने योग्य और दोहराने लायक हो।
Research केवल आपके दिए documents पर चाहिए, तो पहले PDFs, websites और notes वाला research workflow भी समझें। हर task के लिए ongoing agent आवश्यक नहीं है।
Practical example: अगले हफ्ते का blogging plan तैयार कराएँ
मान लें आपके Hindi technology blog पर हर हफ्ते तीन articles आते हैं। आपको नए topics चाहिए, लेकिन पुराने content का duplicate नहीं चाहिए।
नीचे का workflow एक editorial example है। इसे hands-on tested result या तय समय में पूरा होने की guarantee न मानें।

पहले project की ज़मीन तैयार करें
Audience, categories और पहले से published URLs की साफ list दें। केवल website homepage देने से पूरे archive का सही audit हो गया, यह न मानें।
साथ में लिखें कि कौन-से topics नहीं चाहिए। उदाहरण के लिए पुराने launches को fresh news न बताया जाए और paid features को free न लिखा जाए।
Research का output सीमित रखें
पहले पाँच संभावित topics माँगें। हर topic के साथ reader problem, primary source, announcement date और एक practical use case चाहिए।
“Trending” के साथ प्रमाण भी माँगें। किसी tool का नया launch होना, Google searches बढ़ने का प्रमाण नहीं है।
Planning में चयन का कारण माँगें
Planning role से तीन topics चुनवाएँ और दो reject करवाएँ। वजह लिखवाएँ: duplicate, weak source, audience mismatch या फिलहाल सीमित उपयोगिता।
सिर्फ़ topic list नहीं, अगला editorial decision चाहिए। इससे आपको समझ आता है कि calendar किस आधार पर बना है।
अंत में editor की review रखें
हर चुने topic का source खोलें। देखें कि title, availability और कीमत source से match करती है या नहीं।
इसके बाद article assign करें। AI Search के दौर में blogging strategy की तरह original examples और उपयोगी evidence जोड़ने की जगह रखें।
काम सौंपने के लिए यह brief इस्तेमाल करें
एक अच्छा brief बताता है कि काम कहाँ से आएगा, output कैसा होगा और teammate कहाँ रुककर आपसे पूछेगा। केवल role का नाम पर्याप्त नहीं है।
तुम मेरे Hindi technology blog के research teammate हो। Audience: भारत के beginner creators और small-business owners। इस project के published URLs और editorial rules पढ़ो।
अगले सात दिनों के लिए पाँच article opportunities खोजो। हर topic में reader की समस्या, उपयोगी angle, official source URL, source की तारीख और availability limitation दो। पुराने article से overlap हो, तो उसे स्पष्ट बताओ।
Verified fact, अपनी inference और अभी unresolved बात अलग लिखो। बिना प्रमाण किसी topic को viral, free या India में सबके लिए available मत बताओ।
पहले shortlist इसी chat में review के लिए दो। मेरी approval के बिना post publish, message send, paid purchase या account setting change मत करो। Sources न मिलें, तो gap बताकर रुक जाओ।
यह शुरुआत का brief है। अपने blog की भाषा, categories, geography और output format भरकर इसे उपयोगी बनाएँ।
उदाहरण के लिए YouTube channel की research में website article की जगह video angle और visual demonstration माँगें। creators के AI research tools की ज़रूरत भी अलग हो सकती है।
Output खराब आए, तो सिर्फ़ “और बेहतर करो” न कहें। बताएं कि source कमजोर है, title generic है या calendar में दो topics एक ही समस्या दोहरा रहे हैं।
पहला teammate कैसे setup करें?
Official guide के अनुसार Perplexity web में sign in करके sidebar के Teammates section से नया teammate बनाया जाता है। वहाँ plus button से creation शुरू करें।
Name या role दें, appearance चुनें और instructions जोड़ें। Create करने के बाद खुली chat में उसका काम और project context स्पष्ट करें।
- एक भूमिका चुनें: शुरुआत “weekly research shortlist” जैसे सीमित काम से करें।
- Project context दें: Audience, archive और output example जोड़ें।
- ज़रूरी tools जोड़ें: केवल उसी काम के लिए आवश्यक service connect करें।
- छोटा task चलाएँ: पहले एक topic पर sources और short report माँगें।
- Output सुधारें: गलतियाँ बताकर instructions स्पष्ट करें।
- फिर repeat work दें: Schedule या trigger तभी जोड़ें जब test उपयोगी लगे।
UI की wording बदल सकती है; इसलिए वर्तमान setup instructions साथ रखें। यहाँ account में feature चलाकर test करने का दावा नहीं किया गया है।
Slack इस्तेमाल करते हैं, तो workspace, channel और update की destination लिखें। पूरे workspace पर अस्पष्ट monitoring instruction देने से पहले काम का scope छोटा करें।
Permissions और credits पर control कैसे रखें?
पहले read और draft वाला काम चुनें। Publish, customer reply या पैसे खर्च करने वाला काम बाद में सोचें। आपकी instruction और connected tool की permission दोनों स्पष्ट होनी चाहिए।
Research के लिए पूरे inbox की ज़रूरत नहीं है, तो उसे connect न करें। GitHub की ज़रूरत हो, तो केवल संबंधित repositories चुनें।
Client का confidential data जोड़ने से पहले उसकी permission और लागू data policy देखें। सुविधा के लिए अनावश्यक documents upload न करें।
Credits के लिए तीन चीज़ें दर्ज करें: task का scope, इस्तेमाल हुई usage और final output का उपयोग। Parallel agents बढ़ाने से पहले देखें कि अतिरिक्त काम वास्तव में उपयोगी था या नहीं।
- Bounded task: पहले पाँच sources माँगें, पूरे internet का अनिश्चित scan नहीं।
- Stop condition: पर्याप्त evidence मिलने या सीमा पूरी होने पर report माँगें।
- Frequency: Weekly काम को बिना कारण हर घंटे repeat न कराएँ।
- Usage review: Account के Usage page में consumption जाँचें।
- Refill settings: Extra purchases और auto-refill की स्थिति समझें।
किसी promotion को permanent unlimited usage न मानें। अपने account में दिखने वाली वर्तमान credit conditions पढ़ें।
Subscription लेने से पहले AI credits का budget बनाने वाला तरीका अपनाएँ। सफल output का खर्च देखें, केवल कुल generations का नहीं।
क्या $200 का plan आपके काम के हिसाब से सही है?
कीमत का जवाब केवल “AI बहुत काम कर सकता है” से नहीं मिलता। देखें कि आपका कितना दोहराया जाने वाला काम वास्तव में कम हुआ।
एक काल्पनिक calculation लें। आप अपने उपयोगी समय की value $10 प्रति घंटा मानते हैं और monthly subscription $200 है।
केवल subscription के बराबर value पाने के लिए लगभग 20 घंटे की वास्तविक बचत चाहिए। अतिरिक्त credits और output सुधारने का समय जोड़ें, तो आवश्यक benefit बढ़ेगा।
यह personal decision example है, income या savings का दावा नहीं। आपकी hourly value और काम की quality अलग हो सकती है।
| आपकी स्थिति | पहले क्या करें? |
|---|---|
| महीने में दो छोटे research tasks | मौजूदा tools से शुरुआत करें |
| हर हफ्ते कई reports और follow-ups | सीमित pilot में समय और usage मापें |
| पहले से individual Max है | Access दिखे, तो छोटा low-risk task जाँचें |
| Client data या external actions जुड़े हैं | Permissions और review process पहले तय करें |
Freelancer हैं, तो tool cost service pricing में शामिल करें। AI की मदद से freelancing में paid tool होना अपने-आप profitable service नहीं बनाता।
AI report स्वीकार करने से पहले पाँच checks करें
कई agents का एक जैसी बात कहना स्वतंत्र verification नहीं है। वे एक ही कमजोर source या शुरुआती गलत assumption पर निर्भर हो सकते हैं।
- Source खोलें: क्या link वास्तव में claim को support करता है?
- तारीख मिलाएँ: घटना की date और reporting की date अलग तो नहीं हैं?
- Scope देखें: Feature किस plan, region और platform पर उपलब्ध है?
- Disagreement रखें: Sources में अंतर हो, तो उसे मिटाने के बजाय flag कराएँ।
- Next action तय करें: Report से क्या करना है और किसकी approval चाहिए?
अगर report में कई gaps हैं, तो agents की संख्या बढ़ाने से पहले brief सुधारें। गलत दिशा में ज़्यादा काम करवाने से केवल review का बोझ बढ़ सकता है।
शुरुआती research preview में behaviour बदल सकता है। इसलिए critical workflow का backup रखें और किसी एक AI system पर पूरी operational dependency न बनाएँ।
आख़िर में एक छोटी सी बात
Perplexity Teammates का उपयोगी सवाल “कितने agents बना सकते हैं?” नहीं है। सवाल है कि कौन-सा स्पष्ट काम सौंपने से आपका समय और निर्णय बेहतर होंगे।
एक role, एक छोटा project और साफ review process से शुरुआत करें। Output उपयोगी लगे, तभी responsibilities और खर्च बढ़ाएँ।
आप research, content planning या follow-ups में से कौन-सा काम AI teammate को सौंपना चाहेंगे? अपना use case बताएँ और लेख उपयोगी लगा हो, तो comments में अपनी राय दें।