
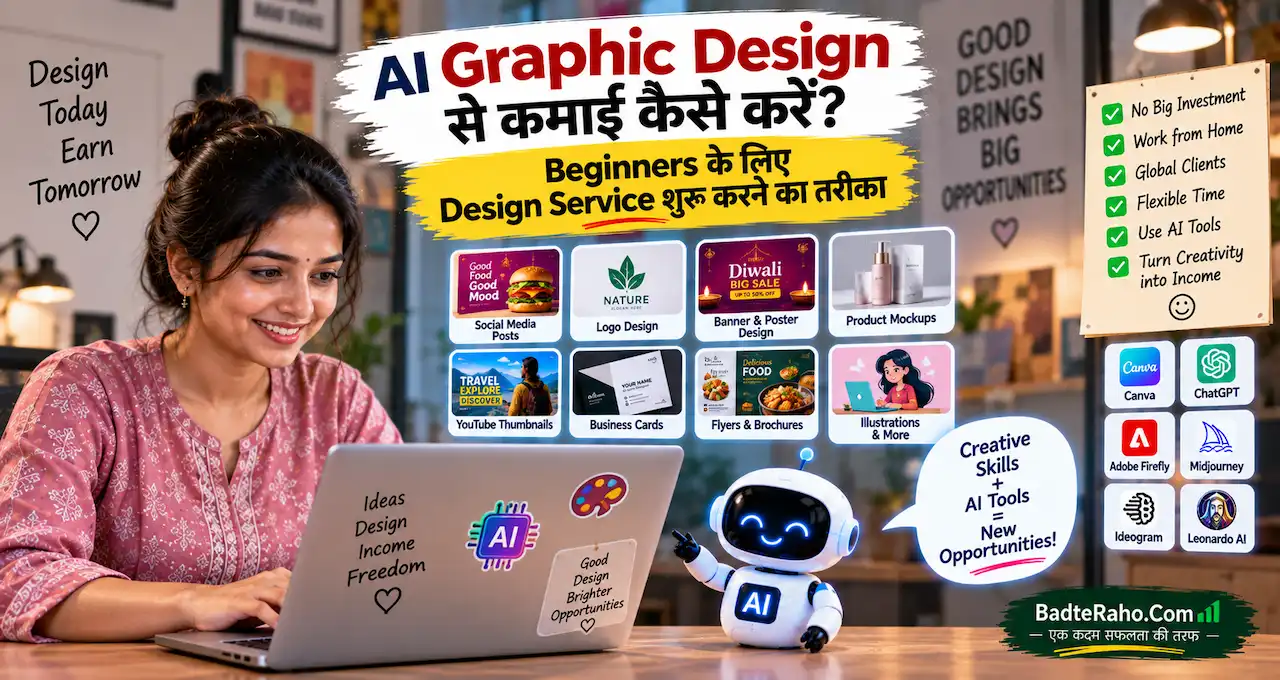
AI graphic design से कमाई शुरू करने का idea इसलिए attractive है क्योंकि आज कई AI tools visual concepts, backgrounds, image variations और editable design drafts बहुत तेज़ बना देते हैं।
लेकिन सिर्फ़ prompt लिखकर image generate कर लेना professional design service नहीं बनाता।
Client को ऐसा final creative चाहिए जो readable हो, brand के हिसाब से हो, सही size में हो और गलत price, spelling, logo या product detail न दिखाए। इसलिए beginner के लिए सही model है: AI speed के लिए, design sense और final judgement इंसान के लिए।
इस guide में समझेंगे कि कौन-सी design services से शुरुआत की जा सकती है, portfolio कैसे बनाएं, client brief कैसे लें, AI कहाँ use करें, pricing और revisions कैसे तय करें और पहला paying client कैसे ढूँढें।
इस लेख में आप क्या सीखेंगे?
- सही design service चुनना
- Client brief समझना
- AI workflow बनाना
- Portfolio बिना client बनाना
- Pricing और revisions तय करना
- First client ढूँढना
- Final quality check करना
AI Graphic Design Service वास्तव में क्या है?
AI graphic design service का मतलब यह नहीं है कि customer की requirement AI tool में paste की और जो पहला output आया वही भेज दिया।
Professional workflow कुछ ऐसा हो सकता है:
Client Brief
↓
Reference और Brand Context
↓
Concept Direction
↓
AI-Assisted Visual Draft
↓
Layout और Typography
↓
Human Editing
↓
Fact Check
↓
Final Export
AI idea generation और first visual draft तेज़ कर सकते हैं, लेकिन hierarchy, readability, brand consistency और final accuracy designer की responsibility रहती है।
अगर AI image generation अभी नया है, तो AI से Photo बनाना कैसे सीखें? Beginners के लिए आसान Guide से basic workflow समझ सकते हैं।
शुरुआत में कौन-सी Design Service चुनें?
Beginner को “मैं हर तरह का graphic design करता हूँ” कहने की बजाय एक narrow service चुननी चाहिए।
Possible services:
- Social media posts
- Business offer posters
- YouTube thumbnails
- Menu cards
- Flyers
- WhatsApp creatives
- Presentation graphics
- Simple product creatives
एक service चुनकर 5–10 strong samples बनाना ज़्यादा useful है।
उदाहरण:
“मैं local businesses के लिए Instagram posts, WhatsApp offer creatives और festival posters बनाता हूँ।”
यह positioning “AI designer available” से ज़्यादा clear है।
Client tool नहीं खरीदता। वह usable design outcome खरीदता है।
Freelance service का basic model समझने के लिए Freelancing क्या है? घर से काम करके पैसे कमाने की शुरुआत कैसे करें? useful रहेगा।
Design Basics सीखे बिना AI पर Depend क्यों नहीं करना चाहिए?
AI attractive visual बना सकता है, लेकिन उसे automatically यह नहीं पता कि आपका customer किस line को पहले पढ़ेगा।
कम-से-कम ये design basics समझें:
Hierarchy: सबसे important information सबसे पहले दिखाई दे।
Contrast: Text background से साफ़ अलग दिखे।
Spacing: हर element को enough breathing space मिले।
Alignment: Elements random position पर न हों।
Typography: बहुत सारे fonts mix न करें।
Color: Brand और readability दोनों को ध्यान में रखें।
Consistency: एक campaign के creatives एक family जैसे दिखें।
अगर ये basics नहीं समझेंगे, तो AI से beautiful लेकिन confusing design मिल सकता है।
Client Brief में क्या पूछें?
Design शुरू करने से पहले client से clear information लें।
कम-से-कम यह पूछें:
Design Type: Poster, social post, thumbnail, flyer या कुछ और?
Platform: Instagram, WhatsApp, YouTube, print या website?
Size: Required dimensions या aspect ratio क्या है?
Main Message: Customer को सबसे पहले क्या समझना चाहिए?
Brand: Logo, colors और fonts available हैं?
Content: Final headline, price, offer और CTA verified हैं?
Reference: Client को कौन-सा visual style पसंद है?
Deadline: Delivery कब चाहिए?
Revisions: कितने revision rounds agreed हैं?
अगर client price या offer देता है, तो उसे exactly note करें। AI से missing discount या urgency invent न करवाएं।
AI Design Workflow कैसे बनाएं?
एक practical workflow रखें।
Step 1: Brief को साफ़ करें
Client की raw WhatsApp message को structured brief में बदलें।
Step 2: Visual direction तय करें
Minimal, bold, premium, traditional, modern या playful style चुनें।
Step 3: AI से concepts बनाएं
Background, mood, composition या image variations generate करें।
Step 4: Best concept select करें
हर output use नहीं करना है। 1–2 strongest directions चुनें।
Step 5: Manual layout करें
Headline, CTA, logo, price और verified details proper hierarchy में रखें।
Step 6: Quality check करें
Spelling, numbers, product image, cropping और readability verify करें।
Step 7: Export करें
Final platform के सही format और quality में deliver करें।
इस process में AI ideation assistant है, final designer नहीं।
बेहतर Visual Prompt कैसे लिखें?
Generic prompt:
Business poster बनाओ।
इससे generic result आएगा।
Better prompt:
Create a modern promotional poster background for a local bakery.
Use warm cream, burgundy and muted-gold colors.
Keep one realistic cake as the main visual.
Reserve a clean headline area at the top and a clear footer for CTA.
Use soft studio lighting and minimal festive decoration.
Do not generate any text, prices, phone numbers, logos or watermarks.
Format: vertical 4:5.
Prompt में purpose, style, composition, color और text-safe area बताना useful है।
Prompt writing improve करने के लिए Prompt Engineering क्या है? AI से बेहतर जवाब पाने के लिए Prompt कैसे लिखें? useful foundation है।
AI से Text भी Generate करवाना चाहिए?
Design visual AI से बनवा सकते हैं, लेकिन important business text manually add करना ज़्यादा reliable है।
AI image generation में कई बार:
Hindi spelling गलत हो सकती है।
Price बदल सकता है।
Phone number गलत हो सकता है।
Random letters आ सकते हैं।
Logo distort हो सकता है।
इसलिए prompt में लिखें:
Do not generate text, numbers, prices, logos or watermarks. Leave clean space for manual text placement.
फिर final text trusted design editor में add करें।
Especially business poster में verified information manually add करना better practice है।
Portfolio बिना Client के कैसे बनाएं?
पहले client के आने का इंतज़ार मत करें।
एक focused portfolio बनाएं।
Example:
- 3 Instagram posts
- 2 Business offer posters
- 2 YouTube thumbnails
- 1 Menu design
- 1 Flyer
- 1 Before/after redesign
लेकिन fake client claim न करें।
Sample पर साफ़ लिख सकते हैं:
Concept Project
या
Practice Redesign
Portfolio में सिर्फ़ final image न दिखाएं। छोटा context भी दें:
Goal: किस problem को solve करना था?
Audience: किसके लिए design था?
Design Choice: Color, layout या hierarchy क्यों चुनी?
इससे client को आपके thinking process का भी अंदाज़ मिलता है।
Supporting images legally source करने हों तो Free Stock Images कहाँ से डाउनलोड करें? Best Websites और Safe Use Guide useful रहेंगे।
Portfolio में किस तरह के Samples रखने चाहिए?
अगर आपका target local businesses हैं, तो portfolio भी उसी market के हिसाब से होना चाहिए।
उदाहरण:
Salon offer creative
Cafe menu post
Boutique festival poster
Gym membership creative
Home bakery order post
Repair service flyer
Random sci-fi poster बनाना creative हो सकता है, लेकिन local client को यह नहीं दिखाता कि आप उसका काम कर सकते हैं।
Target customer जैसा work portfolio में रखें।
AI-Generated Image को Final Design में Use करने से पहले क्या Check करें?
AI output visually strong दिख सकता है लेकिन details गलत हो सकती हैं।
Check करें:
- Extra fingers या strange hands?
- Product shape गलत?
- Packaging text distorted?
- Logo जैसा fake symbol?
- Unreadable background text?
- Strange shadows?
- Duplicate objects?
- Cultural detail गलत?
- Product color actual item से अलग है?
अगर real product client ने दिया है, तो उसका representation misleading न बनाएं।
AI limitation और confident-looking errors समझने के लिए AI Hallucination क्या है? ChatGPT गलत जवाब क्यों देता है और कैसे पहचानें? useful है।
Client का Brand Consistent कैसे रखें?
हर poster का अलग random style professional नहीं लगता।
Client से basic brand kit लें:
Logo
Primary Color
Secondary Color
Preferred Font
Photo Style
Tone
Common CTA
अगर formal brand kit नहीं है, तो simple one-page style sheet बना सकते हैं।
उदाहरण:
Primary: Deep Green
Accent: Cream
Headline: Bold Sans Serif
Body: Simple Sans Serif
Photo Style: Warm, realistic
इससे future creatives जल्दी बनेंगे और brand पहचान consistent रहेगी।
पहला Client कहाँ से मिलेगा?
Beginner के लिए local businesses useful starting point हो सकते हैं।
Potential clients:
Salons
Boutiques
Cafes
Home bakers
Tutors
Gyms
Local stores
Photographers
Small online sellers
पहले personalized outreach करें।
Weak message:
“Sir poster बनवाना है?”
Better approach:
“आपकी Instagram profile देखी। आपके weekend offer के लिए मैंने एक sample layout concept बनाया है जिसमें price और WhatsApp CTA ज़्यादा clear दिख रहे हैं। अगर style useful लगे तो मैं monthly social creatives का package बना सकता हूँ।”
Free में पूरा campaign न बनाएं। छोटा sample concept enough हो सकता है।
Client Outreach का Simple Template
Hi [Name],
मैं small businesses के लिए social media creatives और promotional posters बनाता/बनाती हूँ।
आपकी [Instagram/Profile/Business Page] देखकर मैंने notice किया कि [Specific Observation].
मैंने आपके business type के लिए एक छोटा sample concept तैयार किया है।
अगर यह direction useful लगे तो मैं [X Posts / Posters / Monthly Package] पर काम कर सकता/सकती हूँ।
Portfolio: [Link]
Delivery और revisions का scope शुरू करने से पहले clear रखा जाता है।
हर prospect के लिए observation बदलें। Same generic message 100 लोगों को भेजना personalization नहीं है।
Pricing कैसे तय करें?
Graphic design pricing सिर्फ़ इस बात पर depend नहीं करती कि AI ने image कितनी जल्दी generate की।
Client output के लिए pay कर रहा है।
Pricing में consider करें:
Design type
Complexity
Concept work
Number of sizes
Revisions
Stock assets
AI/tool cost
Delivery speed
Commercial usage
Communication time
Starter models:
Per Design
Design Pack
Monthly Retainer
Example package structure:
8 Social Posts
4 Story/Status Creatives
2 Offer Posters
2 Revision Rounds
यह सिर्फ़ structure example है। Actual price अपने skill, market और workload के हिसाब से तय करें।
बहुत Low Price रखने से क्या Problem हो सकती है?
Beginner सोचता है:
“AI से जल्दी बनता है, इसलिए cheap रखता हूँ।”
लेकिन हर project में brief, communication, revisions, export और quality check का time लगता है।
अगर price इतना low है कि हर client से frustration हो रही है, तो service sustainable नहीं रहेगी।
पहले simple scope रखें।
कम deliverables.
Clear revision limit.
Reasonable turnaround.
जैसे-जैसे quality और demand बढ़े, pricing adjust करें।
Revision Policy पहले क्यों तय करनी चाहिए?
Graphic design में subjective feedback आता है:
“थोड़ा premium करो।”
“Color बदल दो।”
“कुछ अलग try करो।”
“एक और version बना दो।”
अगर scope clear नहीं है तो एक design 10 designs में बदल सकता है।
Project शुरू होने से पहले लिखें:
Included concepts कितने?
Revision rounds कितने?
Size adaptations included हैं?
Major redesign extra होगा?
Source/editable file मिलेगी या नहीं?
इससे client और designer दोनों की expectations clear होती हैं।
AI से Client Feedback Handle कैसे करें?
Client कहता है:
“Poster बहुत crowded लग रहा है, product बड़ा करो और offer area clean रखो।”
AI से revised background या alternate composition generate कर सकते हैं।
लेकिन feedback को blindly prompt में paste करके full design बदलना ज़रूरी नहीं।
Workflow रखें:
Client Feedback
↓
Problem Identify करें
↓
Affected Elements बदलें
↓
AI से ज़रूरत हो तो Variation लें
↓
Manual Refinement
↓
Final Review
छोटी feedback पर पूरा visual direction बदलना time waste कर सकता है।
Copyright और Usage Rights का ध्यान रखें
Graphic design में सिर्फ़ सुंदर image enough नहीं है। Asset legally use किया जा सकता है या नहीं, यह भी important है।
Client project में random Google Image download करके use न करें।
Stock photo, font, illustration, template और AI-generated asset की applicable licence/usage terms check करें।
Famous brand logo, celebrity image या copyrighted character को बिना proper permission commercial creative में use करना risk पैदा कर सकता है।
AI tool use करने पर commercial-use terms भी tool और plan के हिसाब से check करें, क्योंकि policies बदल सकती हैं।
Client Photos और Data की Privacy कैसे Protect करें?
Client आपको भेज सकता है:
Product photos
Customer images
Employee photos
Unreleased offer
Brand files
Phone numbers
Private campaign information
इन files को unnecessary AI tools में upload न करें।
अगर editing के लिए upload ज़रूरी है, तो relevant privacy settings और tool terms समझें।
Sensitive personal data remove करें जहाँ possible हो।
AI privacy के practical basics AI इस्तेमाल करते समय Privacy कितनी सुरक्षित है? Personal Data बचाने के 10 तरीके में समझ सकते हैं।
AI से Graphic Design सीखते समय कौन-सी Skills Develop करें?
Tool names बदल सकते हैं, लेकिन core skills long-term में useful रहती हैं।
Focus करें:
Visual hierarchy
Typography
Color basics
Composition
Image selection
Prompt writing
Photo editing
Brand consistency
Client communication
Export formats
Feedback handling
AI tool चलाना एक skill है, लेकिन design judgement उससे बड़ी skill है।
अगर AI field में broader career direction देखना चाहते हैं, तो AI में Career कैसे बनाएं? बिना AI Engineer बने कौन-सी Skills सीखें relevant है।
एक Reusable Client Design Prompt Template
Project Type: [Instagram Post / Poster / Thumbnail / Flyer]
Business Type: [Business]
Target Audience: [Audience]
Main Goal: [Offer / Enquiry / Booking / Awareness]
Visual Style: [Minimal / Bold / Premium / Modern / Traditional]
Main Visual: [Product / Service / Person / Abstract]
Brand Colors: [Colors]
Required Text-Safe Areas: [Headline / CTA / Footer]
Create a clean visual concept that supports the message and keeps strong hierarchy.
Do not invent prices, discounts, phone numbers, product features, testimonials or brand claims.
Do not generate logos or final business text unless explicitly provided and verified.
Format: [Aspect Ratio].
इस template को final design नहीं, concept-generation starting point की तरह use करें।
पहले 14 दिनों का Beginner Action Plan
Day 1
एक design service choose करें।
Day 2
Target customer define करें।
Day 3
5 portfolio briefs खुद बनाएं।
Day 4–7
Strong portfolio samples तैयार करें।
Day 8
Portfolio को simple shareable page या folder में organize करें।
Day 9
Service package और revision policy लिखें।
Day 10
20 potential clients की list बनाएं।
Day 11
5 personalized outreach messages भेजें।
Day 12
5 और relevant prospects से contact करें।
Day 13
Replies और objections note करें।
Day 14
Portfolio, offer और outreach improve करें।
इन 14 दिनों का goal guaranteed income नहीं है।
Goal है यह देखना कि आपका offer real client को समझ आता है या नहीं।
Common Mistakes जिनसे बचना चाहिए
- सिर्फ़ AI output को design समझना
- Typography और spacing ignore करना
- Fake portfolio client दिखाना
- Business text AI से गलत बनवाना
- हर style एक ही portfolio में डालना
- Copyrighted assets random use करना
- Unlimited revisions देना
- बहुत low pricing रखना
- Client data casually upload करना
- Final size और export check न करना
AI workflow तेज़ कर सकता है, लेकिन quality control की ज़रूरत खत्म नहीं करता।
AI speed के लिए, इंसान judgement और trust के लिए।
आख़िर में एक छोटी सी बात
AI ने graphic design की शुरुआत आसान कर दी है, लेकिन professional service की value अभी भी design judgement, communication और reliable delivery से आती है।
Beginner के लिए सबसे practical रास्ता है कि एक narrow service चुनें—जैसे social media creatives, business posters या thumbnails—और उसी category में focused portfolio बनाएं।
AI से concepts और variations जल्दी तैयार करें, लेकिन final typography, logo, price, CTA, product details और visual balance खुद verify करें। फिर clear pricing, limited revisions और personalized outreach के साथ पहले client तक जाएं।
आपको पहले दिन expert designer बनने की ज़रूरत नहीं है। आपको इतना अच्छा होना है कि एक specific customer problem consistently solve कर सकें और हर project से अपनी skill improve करें।
आप AI graphic design में किस service से शुरुआत करना चाहेंगे—Social Media Posts, Business Posters, YouTube Thumbnails या कोई और? Comments में अपना choice बताएं, ताकि उसी service के लिए portfolio ideas और first-client roadmap पर अगली practical guide बनाई जा सके।