





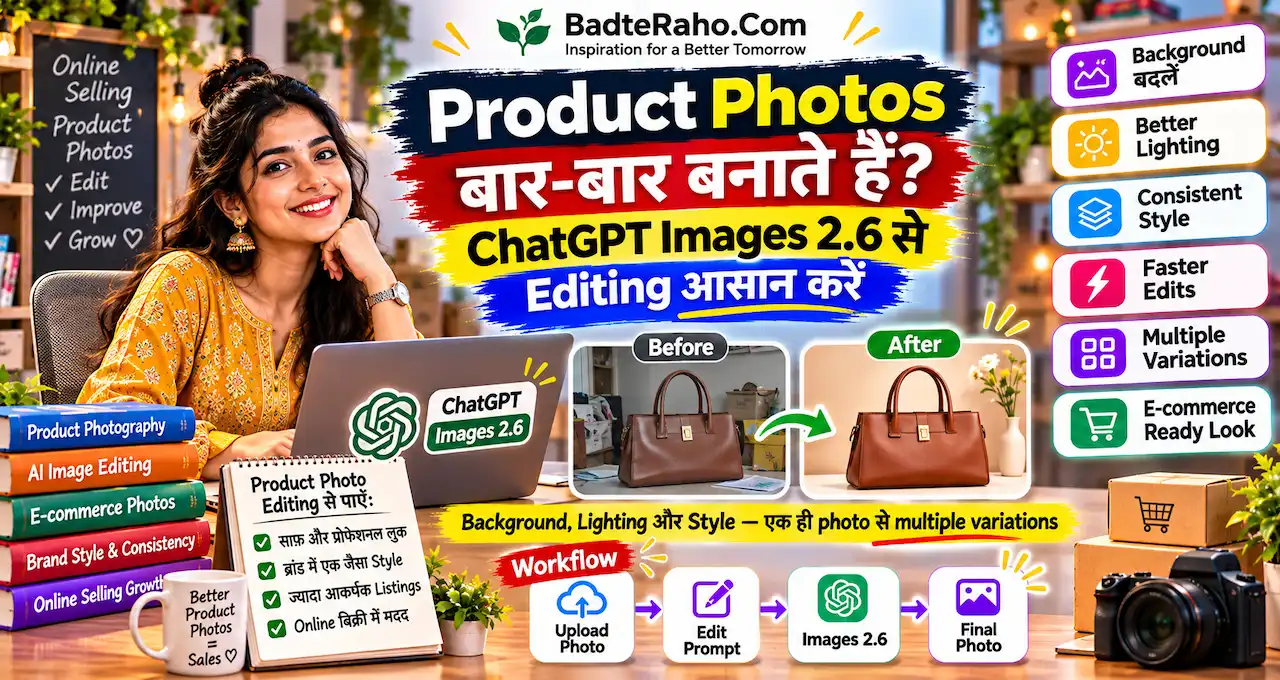

आपने अपने product की अच्छी फोटो खींची, लेकिन background खराब निकल आया? दोबारा शूट करने से पहले ChatGPT Images 2.6 Editing का नया तरीका आज़माया जा सकता है।
मान लीजिए आप handbags, wallets या handmade gifts online बेचते हैं। हर platform के लिए अलग background, lighting और image layout तैयार करना समय लेता है। नया image model इन छोटे-छोटे बदलावों को जल्दी करने में मदद करता है।
यहाँ हम एक फोटो को edit करने का practical workflow, copy करने योग्य prompts और वह checklist देखेंगे जिससे product की असली पहचान बनी रहे।
सबसे दिलचस्प बात यह है कि फोटो दोबारा बनाना और उसी फोटो का सही हिस्सा बदलना, दोनों अलग काम हैं।
इस लेख में आप क्या सीखेंगे?
- Images 2.6 में बदलाव
- एक फोटो से variations
- Background और lighting editing
- Product details कैसे बचाएँ
- Copy करने योग्य prompts
- Final listing photo checklist
Product Photos में बार-बार Editing क्यों करनी पड़ती है?
किसी seller ने एक ही brown leather wallet की फोटो ली। Website के लिए white background चाहिए, Instagram पर lifestyle look और WhatsApp catalog के लिए साफ square photo। Product वही है, लेकिन उपयोग बदलते ही तस्वीर का presentation बदल जाता है।
यहीं सबसे ज़्यादा समय खर्च होता है। हर छोटी correction पर नई photo तैयार करना, दूसरी editing app खोलना या पूरी image को दोबारा generate करना हमेशा practical नहीं होता।
अच्छा workflow एक original photo से शुरू होता है। उसके बाद अलग campaign के लिए सिर्फ ज़रूरी बदलाव किए जाते हैं। इससे visual consistency बनाए रखने का रास्ता मिलता है, लेकिन final accuracy जाँचना फिर भी seller की जिम्मेदारी रहती है।
अगर आपको पहले product marketing के अलग-अलग visuals बनाने हैं, तो product photos और marketing creatives के ready-to-use prompts भी मदद कर सकते हैं। यह guide खासतौर पर एक ही product photo को बार-बार refine करने पर केंद्रित है।
ChatGPT Images 2.6 में नया क्या है?
OpenAI ने 4 नवंबर 2026 को Images 2.6 की घोषणा की। कंपनी के अनुसार नया model पहले की तुलना में लगभग 50% तेज़ image generation देता है। इसका मतलब हर edit हमेशा आधे समय में होगा, ऐसा दावा नहीं है; वास्तविक समय prompt और image की complexity पर निर्भर करता है।
ज़्यादा उपयोगी सुधार editing consistency है। जब आप सिर्फ background बदलने को कहते हैं, model product, उसके रंग और दूसरे details को कई editing rounds के दौरान बेहतर ढंग से बनाए रखने के लिए डिजाइन किया गया है।
| नया बदलाव | Product seller के लिए उपयोग |
|---|---|
| Faster image generation | अलग background ideas जल्दी देखना |
| Better consistency across edits | एक ही product को विभिन्न scenes में रखना |
| More precise editing | पूरी फोटो बदलने के बजाय चुनिंदा हिस्से सुधारना |
| GIF creation | Product photo से छोटा animated creative बनाना |
| Saved references | कुछ workflows में पहले से saved visual दोबारा इस्तेमाल करना |
ChatGPT में GIF creation और saved reference images का rollout चल रहा है। इसलिए आपके account में कोई option अभी दिखाई न दे तो उसे हर user के लिए तुरंत उपलब्ध मानना सही नहीं होगा।
क्या इसके लिए अलग App या Paid Plan चाहिए?
OpenAI Help Center के अनुसार ChatGPT Images web, iOS और Android पर उपलब्ध है और सभी subscription tiers में इस्तेमाल किया जा सकता है। लेकिन generation limits और कुछ advanced options plan या rollout के अनुसार अलग हो सकते हैं।
आपको सामान्य तौर पर अलग Images 2.6 app download करने की ज़रूरत नहीं है। ChatGPT में photo upload करके editing instructions दी जा सकती हैं। Images section के जरिए भी image workflows शुरू किए जा सकते हैं।
Seller के लिए सही सवाल plan नहीं, पहले use case है। एक-दो listing photos ठीक करनी हैं या रोज़ दर्जनों visuals तैयार करने हैं? पहले छोटे sample batch से quality और available limits समझें, फिर paid upgrade पर फैसला करें।
अपनी Product Photo को Edit कैसे करें? पूरा Workflow
यह तरीका handbags, shoes, belts, sunglasses, candles और handmade products पर लागू किया जा सकता है। पहले product का एक clear original photo रखें। Photo जितनी सही होगी, edits की समीक्षा उतनी आसान होगी।
Step 1: Original Photo तैयार करें
Product साफ दिखाई देना चाहिए। उसकी shape, material, zipper, stitching, logo या label जैसी चीजें visible हों। धुंधली photo में AI उन details को अपने अनुमान से भर सकता है, इसलिए बेहतर original photo से शुरुआत करें।
एक मुख्य product और साधारण background रखकर पहली कोशिश करें। अलग-अलग objects वाली crowded photo में AI को समझाना मुश्किल हो सकता है कि किस हिस्से को बदलना है।
Step 2: ChatGPT में Photo Upload करें
ChatGPT खोलें और अपने product की original photo attach करें। फिर बहुत सामान्य निर्देश, जैसे “इसे professional बना दो”, लिखने के बजाय बताएं कि आपको क्या बदलवाना है और क्या बिल्कुल नहीं बदलना है।
उदाहरण के लिए, background को light grey करना है, लेकिन wallet का रंग, stitching और brand mark वैसे ही रखने हैं। यह बात शुरू में स्पष्ट होने से अनचाहे बदलाव कम करने में मदद मिल सकती है।
Step 3: पहले सिर्फ एक बदलाव करवाएँ
एक साथ background, shape, shadows, text और props बदलने को कहेंगे, तो गलती पकड़ना कठिन हो जाएगा। पहले background साफ करवाएँ। Image अच्छी लगे तो अगले prompt में lighting और soft shadow सुधारें।
यही iterative editing का फायदा है। हर बार बिल्कुल नई image के बजाय पिछले result में चुना हुआ बदलाव माँग सकते हैं। फिर भी हर output में product detail compare करें।
Step 4: Listing के हिसाब से Format तय करें
Website product page, Instagram post और ad banner का उद्देश्य अलग होता है। Square composition में product को पर्याप्त space दें। Lifestyle post में environment जोड़ा जा सकता है, लेकिन product मुख्य focus में रहे।
Image के किनारों पर margin रखें ताकि platform के crop या UI overlays से product न कटे। किसी marketplace की image policy मानकर AI को मनमाना logo, badge या decorative text जोड़ने न दें।
Step 5: Original से मिलान करके Download करें
Edited version को zoom करके देखें। क्या color बदल गया? Stitching गायब है? Label का spelling गलत है? क्या AI ने अतिरिक्त pocket, buckle या button बना दिया? ऐसी गलती होने पर सिर्फ वही हिस्सा सही करवाएँ।
फिर final file download करके अपने product listing या campaign में लगाएँ। AI output को final proof नहीं, editable draft समझें। वास्तविक product से मेल खाना sale से भी पहले की शर्त है।
Example: एक Photo को बेहतर बनाने के लिए पहला Prompt
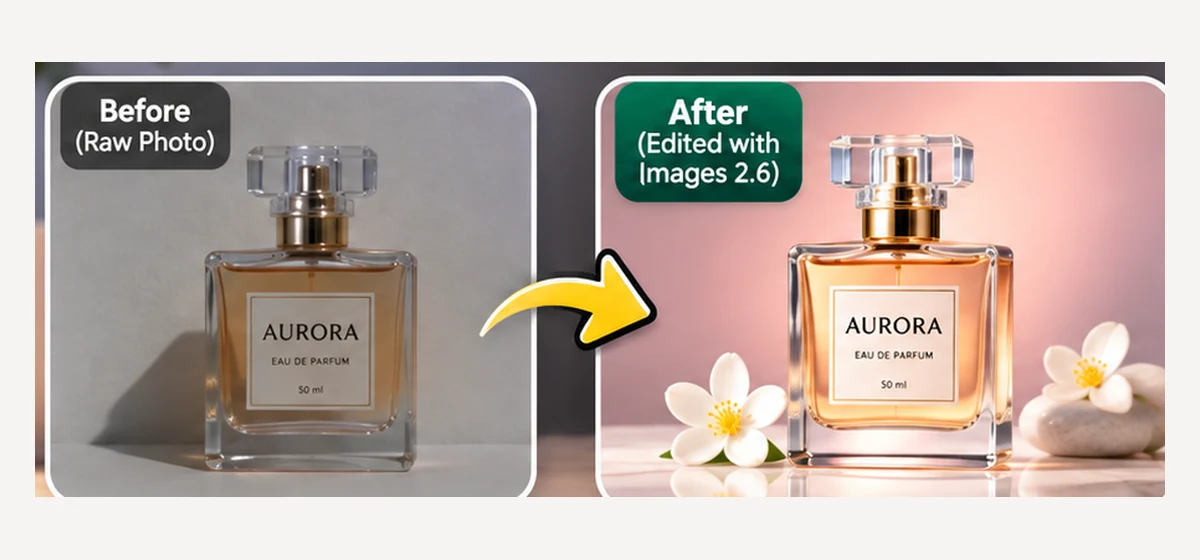
मान लीजिए आपके पास perfume bottle की साधारण photo है। आपको केवल background और lighting ठीक करने हैं। इस तरह के concise लेकिन specific prompt से शुरुआत हो सकती है।
Prompt 1: Clean Product Background
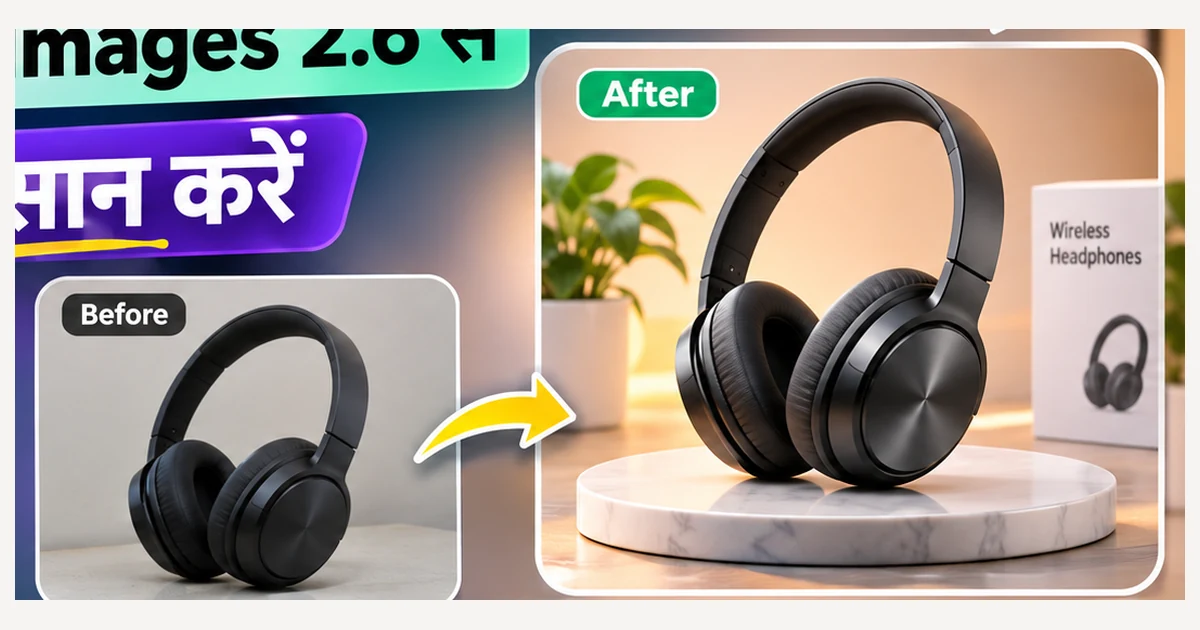
इस uploaded product photo को professional e-commerce style में edit करें। Product की original shape, label, cap, glass color, material, logo और text बिल्कुल वैसा ही रखें। केवल background को clean light neutral studio background में बदलें, soft realistic shadow और balanced lighting लगाएँ। Product की position और proportions न बदलें। कोई नया brand, price, offer, decoration या extra object न जोड़ें। Final result realistic हो, overprocessed नहीं।
नीचे simple before/after concept में सिर्फ presentation बदलती दिखाई गई है। असली product पर काम करते समय हर letter और material detail को original photo से मिलाकर देखें।
Prompt 2: Lifestyle Photo बनाना
Uploaded product photo को premium लेकिन realistic lifestyle setting में रखें। Product का size, shape, color, texture, stitching और label original photo के अनुसार intact रखें। Background ऐसा चुनें जो product के intended buyer और usage से मेल खाए; product के सामने distracting props न रखें। Natural daylight, believable scale और real shadows रखें। किसी feature, accessory, certification या packaging को खुद से invent न करें। Product मुख्य focus में रहे और image advertisement के बजाय authentic product photography जैसी लगे।
यह variation Instagram या visual campaign में उपयोगी हो सकता है। लेकिन lifestyle scene में product का actual size असंभव न दिखे, यह जरूर जाँचें।
Prompt 3: सिर्फ Background Change करना
पिछले edited image में product के सभी pixels, colors, contours, label और fine details यथासंभव unchanged रखें। सिर्फ background को warm off-white से cool light-grey studio background में बदलें। Product के नीचे matching natural shadow बनाए रखें। Camera angle, product position, crop, shape, spelling और any printed text न बदलें। अगर किसी हिस्से में product detail साफ नहीं है, नया detail invent करने के बजाय उसे original के अनुसार रहने दें।
यह तब उपयोगी है जब product अच्छा दिख रहा हो और केवल brand theme बदलनी हो। पूरे scene को फिर से design करने के बजाय एक correction पर focus करें।
Prompt 4: Social Media Creative तैयार करना
Uploaded product को reference बनाकर एक clean social media product creative तैयार करें। Product का design, shade, material, logo और print original के अनुसार रखें। Main product को center में visually prominent रखें; readable headline और खाली space के बीच संतुलन रखें। कोई price, discount, customer review या product claim खुद से न लिखें। केवल नीचे दिए गए verified text को exact spelling के साथ use करें। Format के अनुरूप composition बनाएं, essential visual edges से दूर रखें।
Brand name: [अपना verified brand name]
Main headline: [अपनी approved headline]
Secondary text: [अपना approved message या blank]
Format: [1:1 / 4:5 / 9:16]
Ad creative में लिखे शब्द गलत होने पर design सुंदर होने के बावजूद भरोसा कम होता है। Logo, headline और final crop को post करने से पहले जाँचें।
एक ही Product के लिए कितनी Photos बनानी चाहिए?
हर platform पर पाँच-पाँच तस्वीरें बनाना ज़रूरी नहीं है। छोटे seller के लिए शुरुआत में product के तीन अलग-अलग काम पूरे करना बेहतर रहेगा। यह कोई official marketplace rule नहीं, practical content-planning example है।
| Image type | Purpose | किन बातों पर ध्यान दें |
|---|---|---|
| Clean catalog image | Product साफ दिखाना | Real color, edges, label |
| Detail close-up | Texture या feature दिखाना | Original stitching, hardware, print |
| Lifestyle image | Usage context बताना | Believable scale, relevant background |
पहले catalog image तैयार करें। उसके बाद जरूरत और marketing channel के हिसाब से detail या lifestyle variation जोड़ें। इससे एक ही product की कई लगभग एक जैसी photos बनाने का काम घट सकता है।
अगर seller को product page के साथ पूरा online store बनाना है, तो online store शुरू करने का step-by-step guide अगला practical resource है।
किन Products में Editing से सावधान रहना चाहिए?
Leather wallet में stitching या logo बदलना गलत presentation दे सकता है। Sunglasses में frame size और lens tint महत्वपूर्ण हैं। Cosmetics में ingredients, safety text और packaging के छोटे अक्षर महत्वपूर्ण हैं। Jewellery में stone count या metal appearance बदलने से customer की अपेक्षा गलत हो सकती है।
खासकर जहां buyer texture, size या label देखकर purchase decision लेता है, वहाँ जरूरत से ज्यादा AI enhancement नुकसान पहुँचा सकता है। अगर original product की सही जानकारी नहीं है, AI-generated version को factual proof की तरह पेश न करें।
बेहतर lighting स्वीकार्य improvement हो सकती है; काल्पनिक product feature नहीं। Sellers के लिए AI अपनाते समय privacy और गलत जानकारी का risk समझना भी जरूरी है। इसी संदर्भ में छोटे business के AI risks देख सकते हैं।
Final Photo Publish करने से पहले 7-Point Quality Check
Product listing में edited photo लगाने से पहले original और output को एक साथ खोलें। फोन की छोटी screen पर भी check करें, क्योंकि desktop पर जो detail साफ दिखती है वह mobile पर अलग लग सकती है।
- Shape: क्या dimensions और contours असली product जैसे हैं?
- Color: क्या material और real-world shade में अंतर नहीं आया?
- Logo और text: क्या spelling, label और printed details सही हैं?
- Features: क्या अतिरिक्त pocket, button, zipper या attachment नहीं जुड़ा?
- Background: क्या distracting objects हट गए हैं और product साफ दिखता है?
- Crop: क्या product platform के intended format में पूरा दिखाई देगा?
- Trust: क्या customer को मिलने वाला product image से सचमुच मेल खाता है?
अगर इनमें से कोई गंभीर point fail होता है, image publish न करें। Prompt में केवल problematic हिस्से को सुधारने को कहें या original photo पर लौटें।
क्या Product Photo से GIF भी बना सकते हैं?
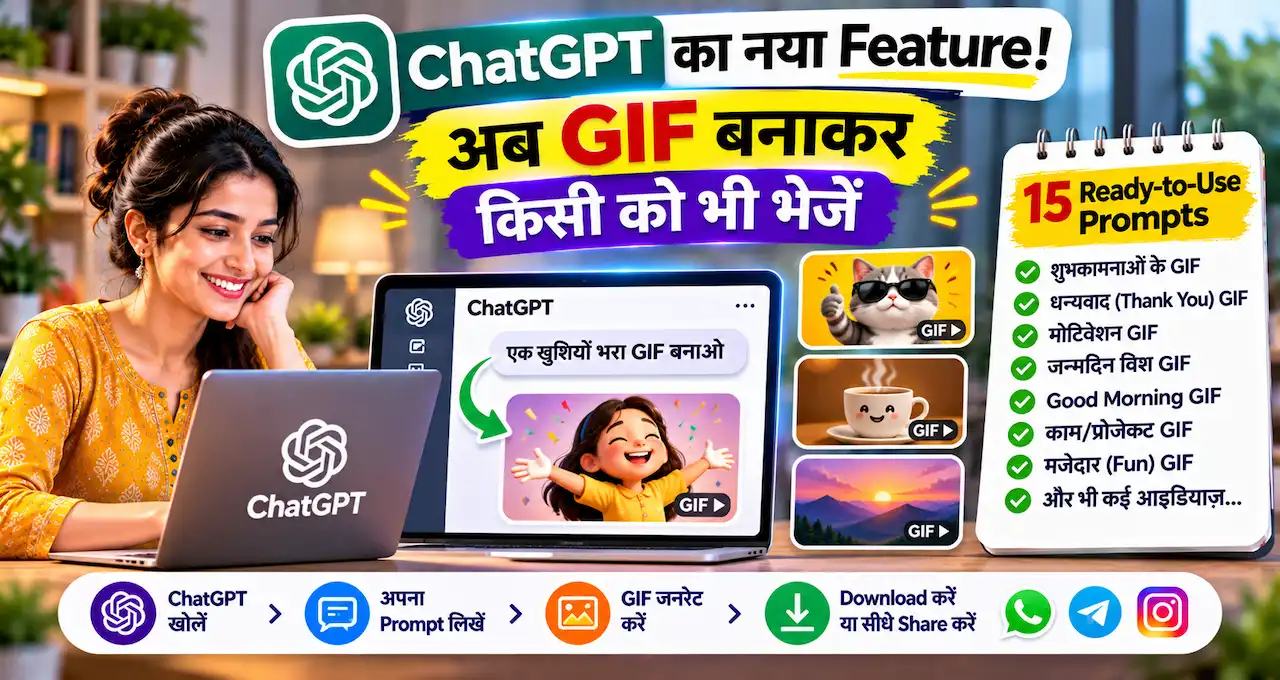
हाँ, Images 2.6 release में GIF generation भी शामिल है। उदाहरण के लिए, किसी product को हल्के motion वाले social creative में दिखाने का प्रयोग किया जा सकता है। लेकिन GIF feature का rollout जारी है, इसलिए हर account में वही option इस समय नहीं दिखेगा।
Social campaign के लिए छोटे animation बनाने से पहले brand color और product detail को हर frame में देखें। Motion ऐसा हो जो product दिखाने में मदद करे, उसे गलत तरह से बदल न दे।
यदि आपका उद्देश्य animated content है, तो BadteRaho पर ChatGPT GIF बनाने के 15 prompts भी उपलब्ध हैं। उन्हें photo editing से अलग workflow की तरह इस्तेमाल करें।
Reusable Master Prompt: अपने Product के लिए Customize करें
अगर आप कई products बेचते हैं, तो एक ही reusable brief बनाना सुविधाजनक है। नीचे दिए गए fields को बदलकर हर नए product के लिए consistent editing instructions दे सकते हैं।
आप एक professional product-photo editor की तरह मेरी uploaded original product photo को edit करें। पहले मौजूदा product के shape, color, texture, labels, printed text, material और visible accessories पहचानें। मेरे कहे बिना इनमें कोई बदलाव न करें। केवल requested background, lighting, composition और output size पर काम करें। Edited image में realistic shadows और believable scale रखें। Missing detail, certification, price, offer, review, packaging, logo या extra feature खुद से न बनाएँ। अगर instructions से product identity बदलने का risk है, उस risk की ओर ध्यान दिलाएँ। Final output के साथ 5-point visual QA checklist भी दें ताकि मैं इसे original से match कर सकूँ।
Product: [जैसे brown leather wallet]
Selling platform: [Website / WhatsApp / Instagram / Marketplace]
Required change: [केवल background / lighting / layout]
Preferred background: [white / light grey / lifestyle scene]
Output format: [1:1 / 4:5 / अन्य]
Verified brand or text: [exact text या none]
Must preserve: [color, stitching, logo, labels, shape]
इस prompt की सबसे महत्त्वपूर्ण line Must preserve है। इसे हर product के हिसाब से ठीक से भरें। बहुत generic instruction देने के बजाय स्पष्ट सीमाएँ बताने से correction rounds की उपयोगिता बढ़ सकती है।
कितना समय बचेगा, और कहाँ Manual Editing बेहतर है?
OpenAI ने model को 50% faster generation वाला बताया है, लेकिन इसका सीधा अर्थ हर seller के workflow time में 50% बचत नहीं है। Upload, checking, regeneration और platform-specific export में भी समय लगता है।
छोटा test करके देखें: एक product की original photo लें। एक catalog image और एक lifestyle edit बनाएं। दोनों की accuracy, number of correction rounds और total effort नोट करें। फिर इसी काम को अपने मौजूदा editing method से compare करें।
अगर logo का हर अक्षर बिल्कुल वैसा चाहिए, packaging compliance महत्वपूर्ण है या pixel-accurate retouching करनी है, तो dedicated photo editor या manual professional review बेहतर हो सकता है। AI speed दे सकता है, लेकिन commercial accuracy की जिम्मेदारी नहीं लेता।
बड़े campaigns में creative assets के साथ product description और messaging भी संभालनी पड़ती है। AI graphic design service का workflow पढ़कर production और review stages को व्यवस्थित करने के ideas मिल सकते हैं।
आख़िर में एक छोटी सी बात
Product photography में अक्सर समस्या नई photo लेने की नहीं, पुरानी photo को सही तरह refine करने की होती है। ChatGPT Images 2.6 इसी repetitive editing को हल्का कर सकता है, खासकर जब हर campaign में original product की identity बचाए रखनी हो।
शुरुआत एक product photo और एक छोटा edit request देकर करें। Original से मिलान करें, फिर ही image को listing या marketing में इस्तेमाल करें।
आप सबसे पहले किस product की photo edit करना चाहेंगे—shoes, wallet, handmade item या कुछ और? यह guide उपयोगी लगी या कोई editing problem सामने आई, तो comment में बताएं।