




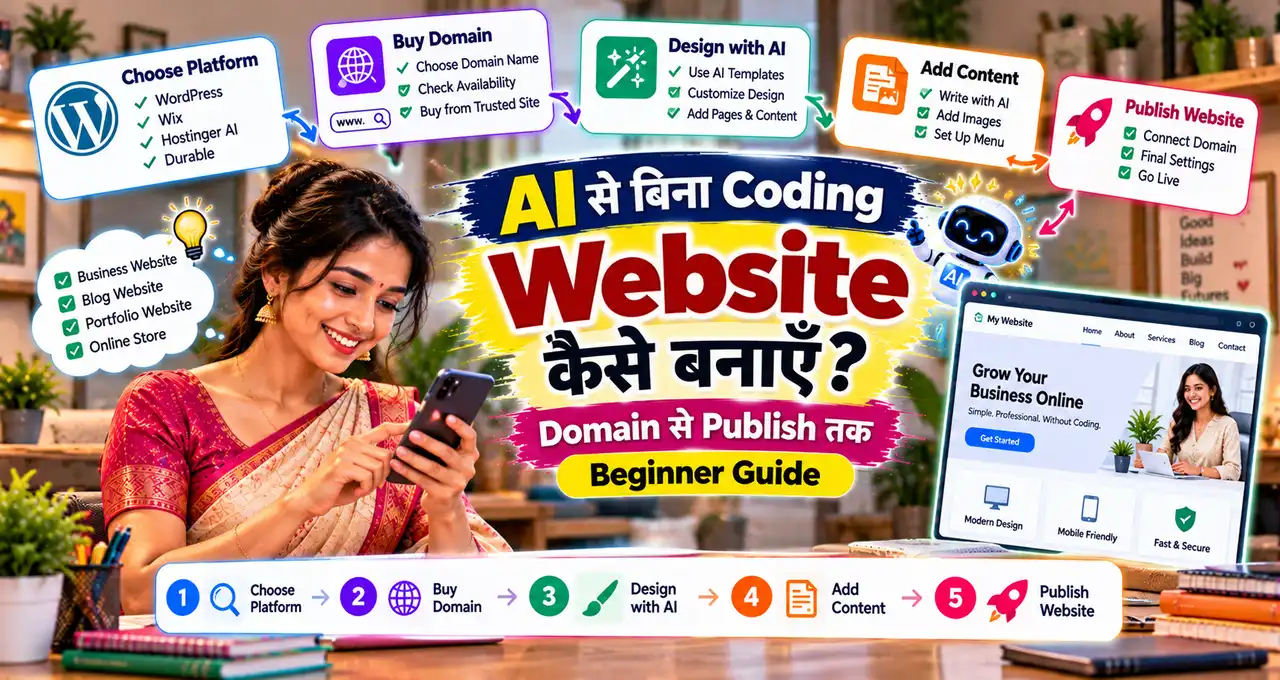

बिना coding सीखे website बनाना अब पहले से काफी आसान है।
AI website builders layout, colors, pages, basic copy और images तक suggest कर सकते हैं, जबकि WordPress जैसे platforms ready themes और visual editors से technical काम कम कर देते हैं। लेकिन सही website सिर्फ़ “AI से बना दो” लिखने से नहीं बनती; purpose, domain, pages, content, mobile view और launch checklist पहले clear करने पड़ते हैं।
इस guide में beginner-friendly तरीके से समझेंगे कि Hostinger, WordPress और Wix जैसे options में क्या फर्क है, domain और hosting कैसे चुनें, AI से first draft कैसे बनवाएँ और publish करने से पहले क्या verify करें।
इस लेख में आप क्या सीखेंगे?
- सही platform चुनना
- Domain hosting समझना
- AI website बनाना
- WordPress setup समझना
- Launch checklist तैयार करना
- Publish के बाद काम
पहले तय करें: Website किस काम के लिए है?
Website builder चुनने से पहले website का goal clear करना सबसे ज़रूरी है। Portfolio, coaching website, local business site, blog और online store की जरूरतें अलग होती हैं।
अगर goal clear नहीं है, तो AI सुंदर design बना सकता है लेकिन structure practical नहीं होगा। उदाहरण के लिए coaching website में Courses, Fees, About, Contact और WhatsApp CTA useful हो सकते हैं, जबकि freelancer portfolio में Work Samples, Services और Enquiry section ज्यादा important होंगे।
Builder खोलने से पहले यह छोटा planning note बनाएं:
- Website किसके लिए है?
- Visitor को क्या करना है?
- कौन-सी 4–6 pages चाहिए?
- Booking या payment चाहिए?
- क्या future में blog जोड़ना है?
- क्या आपको plugins या custom features चाहिए?
AI tools कैसे content और layout generate करते हैं, उसकी basic understanding के लिए Generative AI की basic guide useful रहेगी।
AI Website Builder वास्तव में क्या करता है?
AI website builder आमतौर पर आपसे business type, website goal, preferred style और required sections के बारे में पूछता है। इसके बाद वह initial layout, headings, page structure, colors और sample content generate कर देता है।
यह blank page से शुरुआत करने की problem कम करता है। आपको एक editable first draft मिलता है जिसे बाद में text, images, buttons और sections बदलकर अपने business के हिसाब से refine किया जा सकता है।
लेकिन AI builder को final decision-maker न मानें। वह fake testimonial, generic “best service” claim, गलत price या irrelevant image जोड़ सकता है। इसलिए business facts, contact details, legal pages और payment information हमेशा manually verify करें।
Hostinger, WordPress और Wix में क्या फर्क है?
Beginner के लिए “website builder”, “hosting” और “WordPress” एक जैसे लग सकते हैं, लेकिन इनके workflows अलग हैं। नीचे simple comparison है:
| Option | किसके लिए useful | Control level | Beginner effort |
|---|---|---|---|
| Hostinger AI Website Builder | Simple business, portfolio, landing page | Medium | Low |
| WordPress.com AI | Blog, business site, WordPress-based setup | Medium–High | Low–Medium |
| Hostinger WordPress Hosting | Self-managed WordPress with hosting support | High | Medium |
| WordPress.org | Long-term flexibility, plugins, custom setup | High | Medium |
| Wix AI Website Builder | Visual editing, portfolio, service business | Medium | Low |
यह “best platform” ranking नहीं है। सही choice आपकी website type, budget, ecommerce need, migration plan और future flexibility पर depend करेगी।
Hostinger के दो अलग रास्ते समझें
Hostinger का example लेते समय एक confusion clear करना ज़रूरी है: आप Hostinger का AI Website Builder use कर सकते हैं, या Hostinger hosting पर WordPress install कर सकते हैं। दोनों का workflow अलग है।
Option 1: Hostinger AI Website Builder
Hostinger AI Website Builder उन beginners के लिए useful है जो जल्दी website बनाना चाहते हैं और hosting, domain connection और builder को एक ही dashboard में manage करना पसंद करते हैं। आप idea describe करते हैं, AI first version generate करता है, फिर layout और content edit करते हैं।
यह simple local business, freelancer portfolio, service website या landing page के लिए practical हो सकता है। लेकिन plan लेने से पहले current hosting, domain, ecommerce, AI-credit और renewal details official page पर check करें, क्योंकि offers बदलते रहते हैं।
Option 2: Hostinger पर WordPress
अगर future में plugins, advanced blog, custom forms, membership, SEO plugins या ज्यादा control चाहिए, तो Hostinger Managed WordPress जैसे setup पर WordPress install करना ज्यादा flexible हो सकता है।
यहाँ hosting Hostinger handle करता है, जबकि website WordPress पर चलती है। Beginner one-click setup से शुरुआत कर सकता है, फिर theme और block editor/page builder से बिना coding के pages बना सकता है।
Simple rule: जल्दी और कम setup चाहिए → AI Builder; long-term WordPress flexibility चाहिए → WordPress hosting.
WordPress.com और WordPress.org में फर्क क्या है?
यह beginner confusion बहुत common है। दोनों WordPress software ecosystem से जुड़े हैं, लेकिन hosting model अलग है।
WordPress.com
WordPress.com managed hosting देता है। Current WordPress.com setup में AI website building और AI-assisted editing paid plans पर available हैं। Hosting, security और कई technical tasks platform manage करता है।
अगर आप blog, creator website या small business site बनाना चाहते हैं और server-side setup से बचना चाहते हैं, तो यह beginner-friendly route हो सकता है।
WordPress.org
WordPress.org open-source WordPress software देता है। इसे चलाने के लिए अलग hosting चाहिए—जैसे Hostinger, SiteGround या कोई दूसरा compatible host।
इस route में control ज्यादा मिलता है: themes, plugins, database, backups और custom integrations पर ज्यादा freedom होती है। लेकिन maintenance responsibility भी managed builder की तुलना में थोड़ी ज्यादा होती है।
अगर आपका goal long-term content website या feature-rich WordPress site है, तो self-hosted WordPress practical हो सकता है। अगर सिर्फ़ जल्दी site launch करनी है, managed builder आसान रहेगा।
Wix कब useful हो सकता है?
Wix AI Website Builder visual control और drag-and-drop editing पसंद करने वाले beginners के लिए useful option है। आप free setup से editor explore कर सकते हैं, लेकिन custom domain connect करने और Wix branding हटाने के लिए paid site plan की जरूरत पड़ सकती है।
Wix portfolio, service business, booking-oriented website और visually customized pages के लिए practical हो सकता है। Platform select करते समय सिर्फ़ first-year offer न देखें; renewal, e-commerce, storage, export और future migration भी check करें।
Domain और Hosting को आसान भाषा में समझें
Domain आपकी website का address है, जैसे example.com। Hosting वह service है जहाँ website की files, images, database और code online रहते हैं।
कुछ managed builders hosting automatically include करते हैं। Self-hosted WordPress में आपको hosting plan और domain की जरूरत होती है। कई providers domain और hosting bundle भी देते हैं, लेकिन bundle की current terms हमेशा check करें।
Domain choose करते समय:
- नाम छोटा रखें
- Spelling simple रखें
- Brand name prefer करें
- Unnecessary hyphens avoid करें
- Renewal price check करें
- Domain ownership email सुरक्षित रखें
Free subdomain testing के लिए ठीक है, लेकिन serious business या personal brand के लिए custom domain ज्यादा professional लगता है।
Domain खरीदने के बाद क्या करना होता है?
अगर domain और website एक ही provider पर हैं, तो connection अक्सर guided या automatic होता है। अगर domain किसी दूसरे registrar से खरीदा है, तो आपको DNS records या nameservers update करने पड़ सकते हैं।
DNS को simple language में “internet की address book” समझ सकते हैं। यह बताता है कि आपका domain किस server या website service की ओर point करे।
Domain connect करते समय तीन चीजें ध्यान रखें:
- Provider के exact DNS instructions follow करें
- पुराने records delete करने से पहले समझें वे किस काम के हैं
- Email records बदलने में extra care रखें
DNS update के बाद website तुरंत या कुछ समय बाद accessible हो सकती है। इसलिए important business launch से ठीक पहले last-minute domain migration avoid करना बेहतर है।
AI से Website बनाएँ: Step-by-Step Workflow
Step 1: Website brief तैयार करें
Builder खोलने से पहले 5-minute brief लिखें। इसमें business name, audience, services, location, preferred colors, tone और main CTA रखें।
Step 2: सही platform चुनें
Simple brochure site के लिए AI builder, content-heavy site के लिए WordPress और visual control के लिए Wix practical starting points हो सकते हैं। Platform final करने से पहले required feature list जरूर देखें।
Step 3: AI Builder में clear prompt दें
मेरे लिए एक clean, mobile-friendly website बनाएं। Website का goal visitor को business/service समझाना और clear next action देना हो। Home page पर short hero section, services, trust section, FAQ और contact CTA रखें। Fake testimonials, invented prices, customer numbers या unverified claims न जोड़ें। Content natural Hindi-English में रखें और mobile readability को priority दें।
Business name: [BUSINESS NAME]
Business type: [BUSINESS TYPE]
Target audience: [AUDIENCE]
Location/service area: [AREA]
Main services: [SERVICES]
Required pages: [HOME / ABOUT / SERVICES / CONTACT / OTHER]
Primary CTA: [WHATSAPP / CALL / BOOK / ENQUIRE]
Brand colors: [COLORS]
Style: [MODERN / MINIMAL / PREMIUM / FRIENDLY]
Editable fields prompt के end में हैं, इसलिए इसे save करके अलग projects में reuse किया जा सकता है।
Step 4: Homepage पहले सही करें
Homepage पर visitor को कुछ seconds में समझ आना चाहिए कि आप क्या करते हैं, किसके लिए करते हैं और next step क्या है।
Basic structure:
- Clear headline
- Short value proposition
- Main services
- Real proof or work
- FAQ
- Contact CTA
“We are the best company” जैसे generic claims हटाकर specific information दें।
Step 5: जरूरी pages बनाएं
अधिकांश beginner websites के लिए Home, About, Services और Contact enough starting points हैं। जरूरत के अनुसार Blog, Portfolio, FAQ, Pricing, Booking या Store जोड़ें।
अगर website blogging के लिए है, तो Free AI Tools से Blogging वाली guide content workflow में मदद करेंगे।
Step 6: Mobile view check करें
Desktop design अच्छा दिख सकता है, लेकिन mobile पर heading wrap, button spacing, menu और image crop खराब हो सकते हैं। हर important page को phone-width preview में check करें।
Step 7: Domain connect करें
Custom domain add करें और SSL/HTTPS active है या नहीं check करें। External domain हो तो provider की DNS guide follow करें।
Step 8: Final test के बाद publish करें
Form submit करके देखें, WhatsApp button test करें, menu खोलें और किसी दूसरे phone/browser से site visit करें।
Website Publish करने से पहले 15-point Checklist
- Site name सही है
- Logo readable है
- Mobile layout ठीक है
- Phone और email correct हैं
- WhatsApp button काम करता है
- Contact form test किया है
- Menu links working हैं
- Prices verified हैं
- Fake testimonials हटाए हैं
- Images optimized हैं
- Alt text relevant है
- Page titles meaningful हैं
- Privacy/Terms जरूरत के अनुसार हैं
- HTTPS active है
- Favicon और social preview check हैं
Beginners की कई launch mistakes इसी checklist से पकड़ी जा सकती हैं।
SEO के लिए शुरुआत में क्या करें?
Launch से पहले advanced SEO setup की जरूरत नहीं होती, लेकिन basic foundation useful है।
- हर page का unique title रखें
- Service/location clearly explain करें
- H1/H2 headings logical रखें
- Images compress करें
- Alt text descriptive रखें
- Contact details consistent रखें
- Search indexing setting check करें
AI-generated copy में keywords force न करें। पहले useful और clear content लिखें। Search Console add करना चाहें तो Google Search Console की official site से शुरुआत कर सकते हैं।
Website में Payment या Booking चाहिए तो क्या देखें?
अगर service booking, course fee या product payment लेना है, तो builder का native payment/ecommerce support पहले check करें। हर platform की gateway availability, fees और supported countries अलग हो सकते हैं।
Simple service business के लिए शुरुआत में enquiry form या WhatsApp booking पर्याप्त हो सकती है। Full store चाहिए तो product catalog, tax, shipping, refund policy, inventory और payment gateway पहले plan करें।
UPI, cards और wallets की basics समझने के लिए Digital Payment guide useful है।
Free vs Paid Website Builder: क्या चुनें?
Learning और idea testing के लिए free plan या temporary domain useful हो सकता है। लेकिन business launch से पहले देखें कि custom domain, branding removal, forms, analytics, backups और ecommerce किस plan में मिलते हैं।
Decision लेते समय सिर्फ़ “आज कितने का है” न देखें। यह भी check करें:
- Renewal cost
- Domain renewal
- Email included है या नहीं
- Backup/restore
- Storage और bandwidth
- Plugin/app limits
- Export/migration options
- Support availability
Platform lock-in एक important consideration है। अगर future में site move करनी पड़े, तो content, domain और customer data कितनी आसानी से export हो सकते हैं—यह शुरुआत में समझना बेहतर है।
AI Website बनाते समय 8 Common Mistakes
1. पूरा content AI पर छोड़ देना
AI generic copy बना सकता है। Services, price और business facts आपको verify करने होंगे।
2. Platform सिर्फ़ price देखकर चुनना
Cheap first-year plan long-term में सही हो, यह ज़रूरी नहीं है। Renewal और required features देखें।
3. Homepage को बहुत लंबा बनाना
हर information homepage पर डालने की बजाय clear visitor path रखें।
4. Real images की जगह random AI visuals भर देना
Shop, team, product या work sample available हो तो authentic photo ज्यादा trustworthy हो सकती है।
5. Mobile testing skip करना
Buttons, form fields और menu phone पर जरूर test करें।
6. Domain ownership details ignore करना
Domain renewal email और account access सुरक्षित रखें।
7. Backup या migration plan न देखना
Platform change करना पड़े तो recovery और export options useful होते हैं।
8. Fake claims publish करना
AI-generated “10,000 happy customers” जैसी invented line तुरंत remove करें।
एक Practical 1-Day Website Launch Plan
| Time | Task |
|---|---|
| 30 min | Goal, pages और domain plan |
| 30 min | Platform compare और select |
| 45 min | AI builder से first draft |
| 60 min | Homepage और services edit |
| 30 min | About और Contact complete |
| 30 min | Mobile, links और forms test |
| 20 min | Domain और SEO settings |
| 15 min | Final review और publish |
यह strict deadline नहीं है। Ecommerce, booking system या custom integrations में ज्यादा समय लगेगा। Simple portfolio या local business site के लिए यह blank page से live website तक useful roadmap है।
Publish के बाद क्या करें?
Website publish होना finish line नहीं है। अगले कुछ दिनों में real users से feedback लें और देखें कि उन्हें contact, pricing या services समझने में confusion तो नहीं हो रहा है।
Analytics, Search Console और enquiry tracking धीरे-धीरे add करें। सबसे पहले यह confirm करें कि site fast open हो रही है, contact actions काम कर रहे हैं और important content updated है।
AI बाद में FAQ draft करने, page copy improve करने, blog ideas निकालने और repetitive updates plan करने में मदद कर सकता है। लेकिन final review human रखें।
आख़िर में एक छोटी सी बात
AI ने website बनाने की technical entry barrier कम की है, लेकिन अच्छी website अभी भी clear planning, सही platform और real information पर depend करती है। Beginner के लिए best शुरुआत वही है जिसमें unnecessary complexity कम हो और future जरूरतों के लिए enough flexibility रहे।
Hostinger AI Builder, WordPress.com, self-hosted WordPress और Wix—चारों के अपने use cases हैं। पहले website का goal लिखें, फिर platform चुनें; उल्टा करने पर बाद में migration और feature limitations की problem बन सकती है।
अपनी पहली website के लिए पहले चार जरूरी pages, एक custom domain और एक clear CTA तय करें। फिर official platform links देखकर current plans compare करें और उसी setup से शुरुआत करें जो आपके अगले 1–2 साल के काम को संभाल सके।